This post is part of series:
- Part 1: Overview
- Part 2: Request and URI
- Part 3: Response
- Part 4: File Uploads
- Part 5: HTTP-Client
- Part 6: Server Request
- Part 7: Middleware
- Part 8: Usage in a Magento module
The fifth part of the PSR-7 series describes the HTTP Client.
The HTTP client is tool which sends a request to a server and returns the response.
Sadly PSR-7 does not contain an interface for the HTTP client. The Standard contains only the HTTP messages. The client itself is part of the proposed PSR-18.
PSR-18 is very small. It contains only an Interface with one method and some exception classes. The important part is the sendRequest method. It is easy as pie. A request has to be passed and the client should return a response or throw an ClientException exception.
interface ClientInterface
{
    /**
     * Sends a PSR-7 request and returns a PSR-7 response.
     *
     * @param RequestInterface $request
     *
     * @return ResponseInterface
     *
     * @throws \Psr\Http\Client\ClientException If an error happens during processing the request.
     */
    public function sendRequest(RequestInterface $request): ResponseInterface;
}
At the moment we cannot use PSR-18 in a production environment until it is accepted by the FIG. Fortunately there is an other project which tries to close the gap until the PSR-18 is accepted. The project is the father of the PSR-18. We talk about the HTTPPlug Project (former PHP-HTTP).
HTTPPlug Project
The project’s homepage is http://httplug.io/. The main idea is to decouple a PHP package/library from implementation by providing a HTTP client abstraction and some standard implementations.
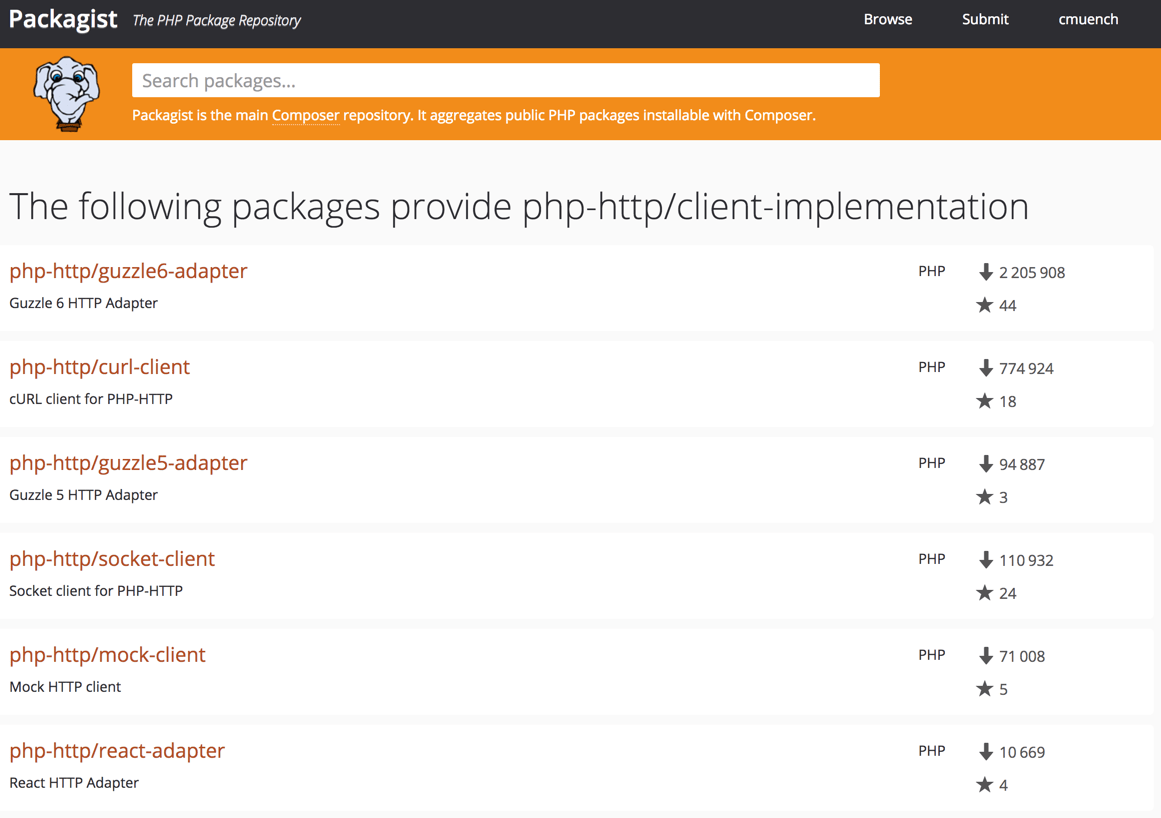
It provides a Composer meta package. You don’t know what a Composer meta package is? Think of it as a kind of interface for packages.
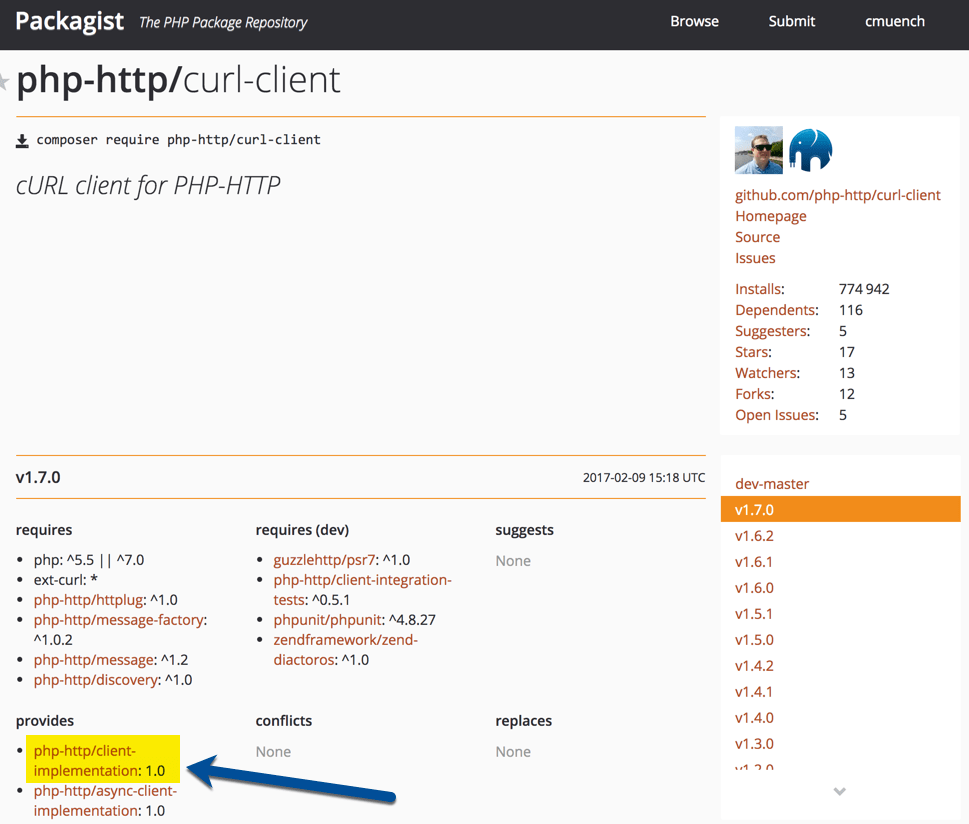
This meta package can be added as requirements in your composer.json. Any compatible package can “provide” an implementation for the meta package.
If you need a HTTP Client Implementation in your project, you should relay on the meta package instead of an real implementation.
The implementation can be fulfilled in a project where the PHP library should be used. It is possible to pick any implementation from a huge list of existing implementations.
An Example Library
First we need a composer.json which requires a client implementation. For testing purposes we can add a development requirement to add some example scripts to the library. The HTTP-Plug project comes with a small and handy CURL based implementation which provides an implementation for the meta package. For the message implementation i.e. the Request, we make use of Guzzle’s PSR-7 implementation (see previous posts).
{
  "name": "acme/my-super-php-library",
  "require": {
    "php-http/client-implementation": "^1.0",
    "guzzlehttp/psr7": "^1.4"
  },
  "autoload": {
    "psr-4": {
      "Acme\\MyLibrary\\": "src"
    }
  },
  "require-dev": {
    "php-http/curl-client": "^1.7"
  }
}
After a composer install we are ready to create a sample service which uses the HTTP client. Let’s try to fetch the XML feed from dev98.de.
We create a service class to fetch the XML feed. The service has a dependency to the HTTP Client interface. The file should be placed in the “src” sub-directory according to our PSR4 autoloading setting in composer.json file.
<?php

namespace Acme\MyLibrary;

use GuzzleHttp\Psr7\Request;

class FetchXmlFeedService
{
    /**
     * @var \Http\Client\HttpClient
     */
    private $client;

    /**
     * ExampleService constructor.
     * @param \Http\Client\HttpClient $client
     */
    public function __construct(\Http\Client\HttpClient $client)
    {
        $this->client = $client;
    }

    /**
     * @return \SimpleXMLElement
     * @throws \Exception
     */
    public function fetch(): \SimpleXMLElement
    {
        $request = (new Request('GET', 'https://dev98.de/feed/'))
            ->withHeader('Accept', 'application/xml');

        $response = $this->client->sendRequest($request);

        if ($response->getStatusCode() !== 200) {
            throw new \Exception('Could not fetch XML feed');
        }

        return simplexml_load_string($response->getBody()->getContents());
    }
}
The service does not rely on a real implementation. The \Http\Client\HttpClient is only an interface.
Now we create a sample script which calls our service in the sub-directory “examples”.
<?php

require_once __DIR__ . '/../vendor/autoload.php';

$httpClient = new \Http\Client\Curl\Client();
$service = new \Acme\MyLibrary\FetchXmlFeedService($httpClient);
$xmlData = $service->fetch();

foreach ($xmlData->channel->item as $item) {
    echo (string) $item->title . "\n";
}
That’s our simple library with an example script. Testing this library is also not a big deal. We can easily mock the Interface.
Use the Library
If we want to use the library in a real project, we need to add the library in our project’s composer.json file. Then we add an implementation for the http client. This must not be the same as the development requirements in our library. This is a big advantage. If our PHP framework comes with an implementation which fits, we can re-use it.
The complete source of the blog post is available on Github: https://github.com/cmuench/psr7-example-library
The next blog post in this series describes the Server-Request.

– Creator of n98-magerun
– Fan of football club @wormatia
– Magento user since version 0.8 beta
– 8x certified Magento developer
– PHP Top 1.000 developer (yes, I’m PHP4 certified and sooooo old)
– Chief development officer at netz98