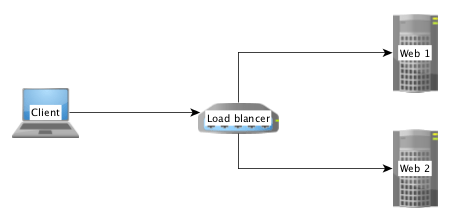
When a Magento shop – or any other PHP application – is required to request data from or transmit data to a remote server, it is often necessary to redirect the traffic through a Http-proxy server. In my case this was essential because the called endpoint allows only certain IP addresses to access the requested ressource. Since I am working from various locations, each having a different IP address, I had to find a way that certain Http-requests are routed through the company’s proxy server. This article is going to describe what a proxy actually does for us, why I cannot and should not use PHP’s environment variables and what the best solution is for scenarios where PSR-7 / PHP-Http in combination with GuzzleHttp might be.
What about PSR-15?
Good point! This text will discuss Http middleware components on client side with the example of adding proxy configurations to a request. The relatively new PSR-15 standard handles the server side and focuses mainly on manipulating the response which is sent back to the calling host. Nevertheless you will get a lot of useful information from the standard and the explanation.
Why don’t you simply use the the HTTP_PROXY environment variable?
Guzzle indeed accesses the PHP environment variable HTTP_PROXY and routes every request through the specified proxy, if this value is actually configured in php.ini or by using the setenv()-command. But for security reasons this feature is only available when the script is called from the shell (checked using method php_sapi_name()). More information on the vulnerability and the reason why GuzzleHttp declines to use the settings from environment variables can be found at httpoxy.org.
GuzzleHttp offers a proxy-configuration within the request()-method – why not use this?
Because it it not PSR-7 compliant! The HTTP message interface simply does not provide a method with name request that allows the developer to pass an options-array in which we could add our proxy-configuration. Instead the interface does only declare a method sendRequest that accepts an object of type \Psr\Http\Message\RequestInterface which also does not offer any proxy configuration.
Middleware and Handlers
Middleware components are a powerful – and PSR-7 compliant – way to manipulate Http requests before they’re sent to a remote server.
In an example scenario where it would be required to send authentication data in each server call, it’d sure be exhausting to update the credentials for each method call all over your application’s code. Adding a middleware layer that automatically adds the necessary data to each request, before it is transmitted, will reduce the code lines to be updated to just a single one (maybe two).
A middleware is simply a method that resides between the command for sending a request and the actual transmittion. It allows to add, remove or modify data, the target-URL or any other property of the \Psr\Http\Message\RequestInterface as well as additional configuration, that is important for data transfer.
More information on the PSR-7 standard is given in our in-depth series.
Create a middleware and add it to the HandlerStack
The diagram below sketches on the top half the classical way of sending a request: The developer adds a a sendRequest command along with the connection and data settings hold by $request and passes it to a various transmittion mechanism, e.g. GuzzleHttp.
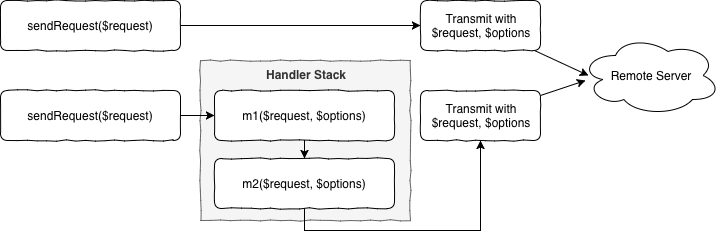
In the bottom half of the diagram two sample middleware methods m1 and m2 are added to stack that resides between sending the request and the actual transmittion. Both methods are free to modify the request or the configuration hold by $options and are executed one after another, as described by the chain of responsibility, part of the infamous Gang of Four.
The following implementation has proven to be stable but might be a bit more complex than what is actually necessary to create a middleware method. The reason for that is because of a better test-ability and more flexibility for future add-ons.
Class ProxyMiddleware
First step is to create a new class called ProxyMiddleware that is responsible to prepare the concrete middleware method for the handler stack, managed by GuzzleHttp. This class has static method, which holds the proxy settings (URL and port) and will return a closure that will be pushed onto the handler stack later.
public static function getProxyMiddleware($serverUrl): callable
{
self::$proxyUrl = $serverUrl;
return function (callable $handler) {
return new ProxyMiddleware($handler);
};
}
As soon as the closure is called during data transmittion a new instance of the ProxyMiddleware-class is created and invoked by the stack dispatcher. Therefore we need to implement the actual middleware-call inside of the magic __invoke-method:
public function __invoke(RequestInterface $request, array $options)
{
$fn = $this->nextHandler;
$options['proxy'] = [
'http' => self::$proxyUrl,
'https' => self::$proxyUrl,
];
return $fn($request, $options);
}
It’s that simple! We just add the proxy information to the $options-array and pass the new information onto the method described by $nextHandler. That was easy!
Add our middleware to the handler stack
After we have created the middleware handler, we need to tell GuzzleHttp to actually execute it after the sendRequest-command is executed. For this second step we need to instantiate a new HandlerStack-object using the class’ static create-method.
$handlerStack = \GuzzleHttp\HandlerStack::create();
$handlerStack->push(ProxyMiddleware::getProxyMiddleware('proxy_url'), 'middleware_id');
$options['handler'] = $handlerStack;
$httpClient = \Http\Adapter\Guzzle6\Client::createWithConfig($options);
Now we simply push the previously described closure onto the stack together with an identifier-string. Allthough this ID is optional, it will be more than helpful for debugging your application, since Guzzle adds a couple of default middlewares to the stack and you would end up in a unmanageable mess.
After we have created and configured the handler stack, we simply use the static createWithConfig-method that allows us to inject a options-array into the instantiation of a new Guzzle PSR-7 compliant Http client.
From now on, all requests that are sent using this Http client will be transmitted with your middleware executed inbetween and having the proxy setting configured!
Caveat: Unit Testing
Testing your new middleware-class might be a little bit tricky. I just want you to know that closures, like the class member $nextHandler can be mocked using PHP’s pre-defined core class \stdClass and the magic __invoke method. In case you’re using PHPUnit, the following snippet might be helpful:
$nextHandlerMock = $this->createPartialMock(\stdClass::class, ['__invoke']);
More information
- https://dev98.de/2017/01/17/psr-7-standard-part1-overview/
- http://docs.guzzlephp.org/en/stable/handlers-and-middleware.html
- http://docs.guzzlephp.org/en/stable/request-options.html#proxy
- https://medium.com/@brad_brothers/build-a-better-api-client-with-guzzle-middleware-2ace56868dc7
- https://github.com/darrenmothersele/php-psr7-proxy

Passionate developer, engineer and tinkerer