Author: Christian Münch

  • Get PDF files by Magento Webapi

    Get PDF files by Magento Webapi

    Magento 2 comes with a modern REST interface. One of the advantages of the REST interface is that it can handle multiple response types. A client can request data from the server with a list of acceptable response formats. Out of the box Magento 2 supports two types. It comes with JSON and XML support.

    You can test it with a simple call to your local store.

    curl -X GET --header "Accept: application/json" "http://<store-baseurl>/rest/default/V1/categories"

    If you omit the accept header the server will return JSON as default. Let’s change the accept header to “application/json”.
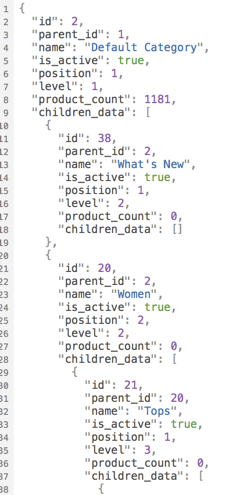
    curl -X GET --header "Accept: application/xml" "http://<store-baseurl>/rest/default/V1/categories"

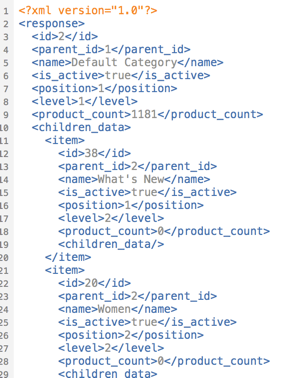
    Now you should see a well formed XML document:
    Extend the list of acceptable mime types

    Magento 2 can handle JSON and XML. What if we want to add an alternative return format? The bad news… it cannot handle it by default. The good news… You can add the support by yourself.
    The response is generated internally by response renderers which must implement the RendererInterface.

    interface RendererInterface
    {
        /**
         * Render content in a certain format.
         *
         * @param object|array|int|string|bool|float|null $data
         * @return string
         */
        public function render($data);
    
        /**
         * Get MIME type generated by renderer.
         *
         * @return string
         */
        public function getMimeType();
    }
    

    The interface is really simple. A mime type must be defined. In our example we intend to handle the mime type “application/pdf”. The main idea of this demo is to return an existing invoice directly as printable PDF document instead of the JSON or XML data.

    ## Request Workflow

    A request by a browser or a HTTP client (i.e. curl) is sent to the server. The request is dispatched by a special REST FrontController. The FrontController executes some business logic and passes the generated output data to a response object. The response object is generated by a RendererFactory which creates a renderer object based on the mime types of the request accept header.
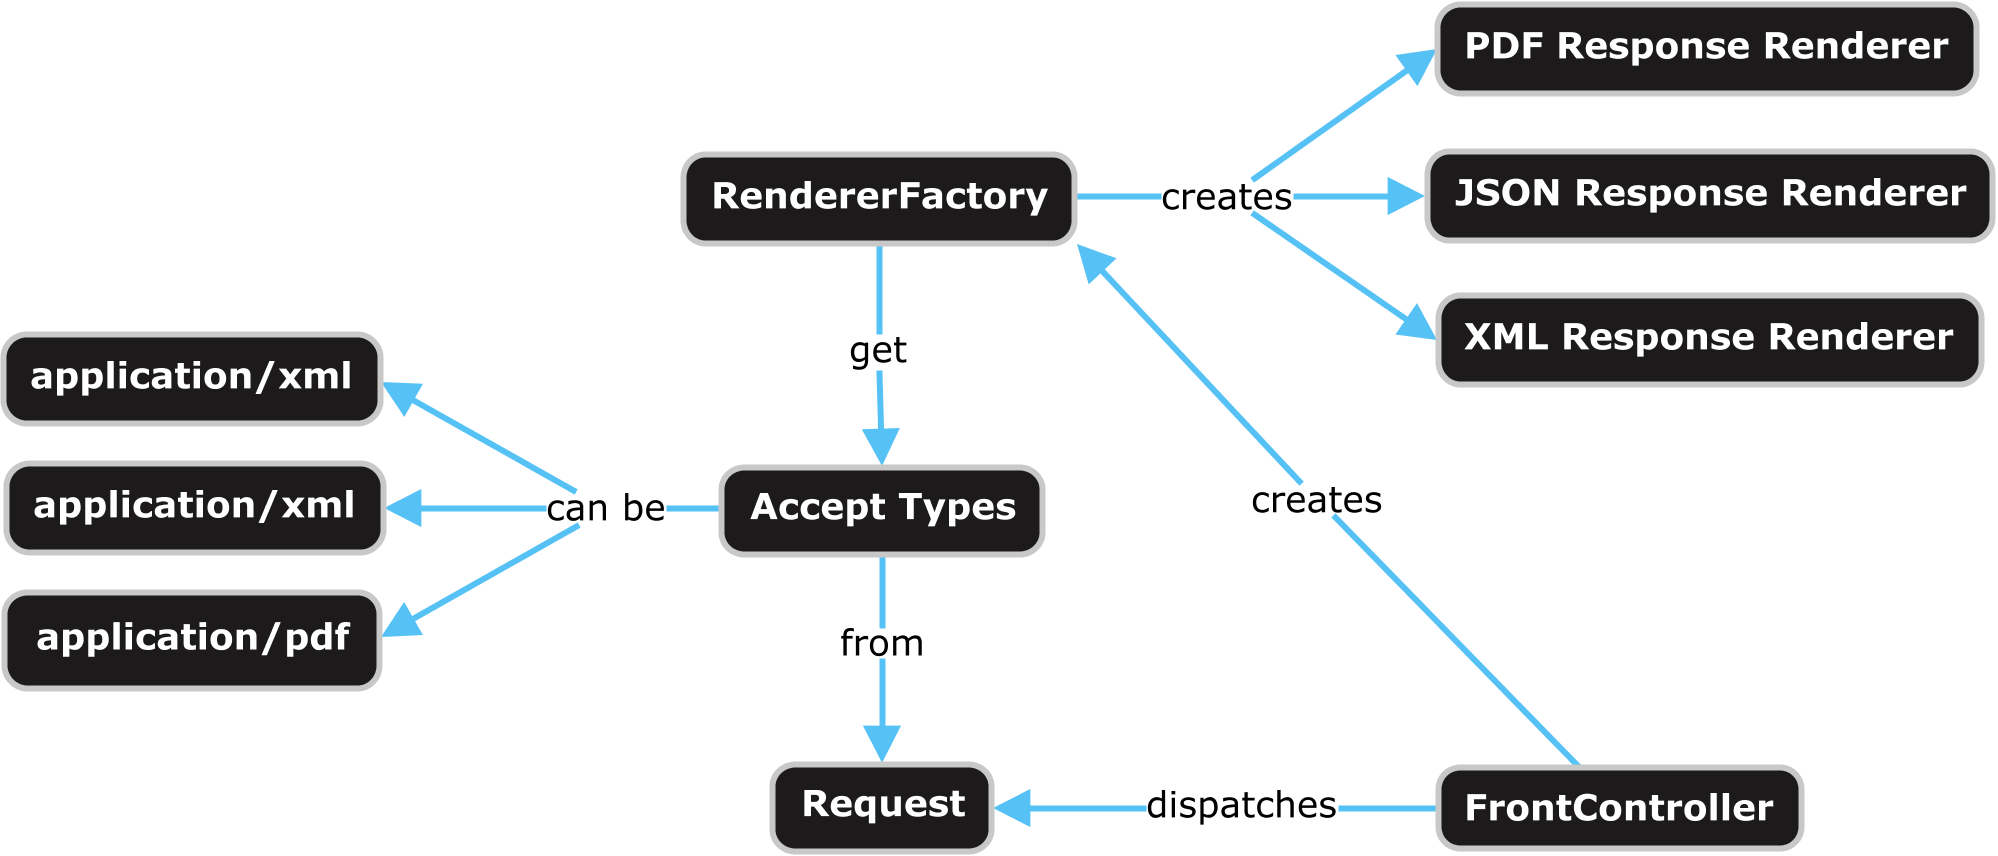
    Webapi Response Rendering Overview

    If we want to add our own renderer for a specific mime type we can use the Magento 2 Dependency Injection for that. The RendererFactory gets a list of available renderers via di.xml. The next thing we need to do is to create an own module and to add the di.xml in our module with following content:

    <?xml version="1.0"?>
    <config xmlns:xsi="http://www.w3.org/2001/XMLSchema-instance"
            xsi:noNamespaceSchemaLocation="urn:magento:framework:ObjectManager/etc/config.xsd">
    
        <type name="Magento\Framework\Webapi\Rest\Response\RendererFactory">
            <arguments>
                <argument name="renders" xsi:type="array">
                    <item name="application_pdf" xsi:type="array">
                        <item name="type" xsi:type="string">application/pdf</item>
                        <item name="model" xsi:type="string">\N98\WebapiRestPdf\Response\Renderer\PdfRenderer</item>
                    </item>
                </argument>
            </arguments>
        </type>
    
    </config>
    

    Now our response renderer must be created. It must implement the renderer interface. Firstly we add the getMimeType method and let them return the value “application/pdf”. Secondly we implement the render method which returns the PDF data. In our example we only support the REST URL “/V1/invoices”.

    <?php
    namespace N98\WebapiRestPdf\Response\Renderer;
    
    use Magento\Framework\Webapi\Exception;
    use Magento\Framework\Webapi\Rest\Request;
    use Magento\Framework\Webapi\Rest\Response\RendererInterface;
    use Magento\Sales\Api\InvoiceRepositoryInterface;
    use N98\WebapiRestPdf\Service\InvoicePdfGeneratorService;
    
    class PdfRenderer implements RendererInterface
    {
        /**
         * @var \Magento\Framework\Webapi\Rest\Request
         */
        private $request;
    
        /**
         * @var \N98\WebapiRestPdf\Service\InvoicePdfGeneratorService
         */
        private $invoicePdfGeneratorService;
    
        /**
         * @var \Magento\Sales\Api\InvoiceRepositoryInterface
         */
        private $invoiceRepository;
    
        /**
         * Pdf constructor.
         * @param \Magento\Framework\Webapi\Rest\Request $request
         * @param \N98\WebapiRestPdf\Service\InvoicePdfGeneratorService $invoicePdfGeneratorService
         * @param \Magento\Sales\Api\InvoiceRepositoryInterface $invoiceRepository
         */
        public function __construct(
            Request $request,
            InvoicePdfGeneratorService $invoicePdfGeneratorService,
            InvoiceRepositoryInterface $invoiceRepository
        ) {
            $this->request = $request;
            $this->invoicePdfGeneratorService = $invoicePdfGeneratorService;
            $this->invoiceRepository = $invoiceRepository;
        }
    
        /**
         * Render content in a certain format.
         *
         * @param object|array|int|string|bool|float|null $data
         * @return string
         * @throws \Magento\Framework\Webapi\Exception
         */
        public function render($data)
        {
            if (!strstr($this->request->getPathInfo(), '/V1/invoices')) {
                throw new Exception(__('PDF rendering is not supported for this URI'));
            }
    
            if (isset($data['entity_id'])) {
                $invoice = $this->invoiceRepository->get($data['entity_id']);
                $pdf = $this->invoicePdfGeneratorService->execute($invoice);
    
                return $pdf->render();
            }
         
            return null;
        }
    
        /**
         * Get MIME type generated by renderer.
         *
         * @return string
         */
        public function getMimeType()
        {
            return 'application/pdf';
        }
    }
    

    For a better software architecture we place the PDF generation code in an own InvoicePdfGeneratorService class.

    <?php
    namespace N98\WebapiRestPdf\Service;
    
    use Magento\Sales\Api\Data\InvoiceInterface;
    
    class InvoicePdfGeneratorService
    {
        /**
         * @var \Magento\Sales\Model\Order\Pdf\Invoice
         */
        private $invoicePdf;
    
        /**
         * PdfGeneratorService constructor.
         * @param \Magento\Sales\Model\Order\Pdf\Invoice $invoicePdf
         */
        public function __construct(\Magento\Sales\Model\Order\Pdf\Invoice $invoicePdf)
        {
            $this->invoicePdf = $invoicePdf;
        }
    
        /**
         * @param \Magento\Sales\Api\Data\InvoiceInterface $invoice
         * @return \Zend_Pdf
         */
        public function execute(InvoiceInterface $invoice)
        {
            return $this->invoicePdf->getPdf([$invoice]);
        }
    }
    

    That’s all we need to code. As you can see Magento 2 is very extendable. If you have ideas for additional formats, create your own renderer.

    Testing

    Before we start a test of the new functionality, we need an invoice in the database. Simply create a new order in your shop and create an invoice for it in the Magento admin.

    To test the new renderer we can use CURL again. To fetch an invoice you need API credentials. The simplest way to do that, is to get an “Access Token”.

    Have a look in the documentation to see how you can obtain an access token: http://devdocs.magento.com/guides/v2.1/get-started/authentication/gs-authentication-token.html

    On my local machine this CURL command looks like this:

    curl -o invoice.pdf -X GET \
    --header "Accept: application/pdf" \
    --header "Authorization: Bearer 0b4sdr02nis73md8qsg3y3b6uk4hi5k4" \
    "http://magento.dev/rest/default/V1/invoices/1"

    This command calls the Magento Shop, which should now return the content of a PDF file. The PDF content is written to the file “invoice.pdf”.

    My PDF looks like this:
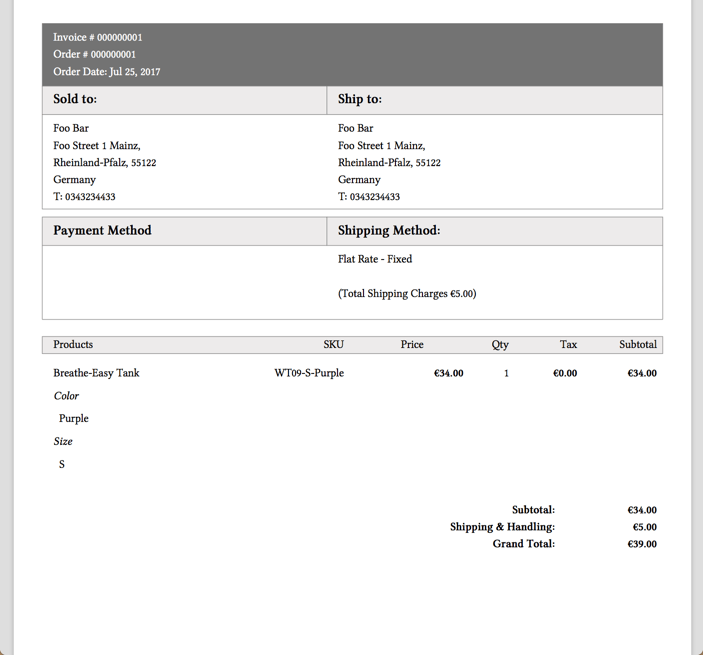
    Great! We can now get PDF invoices by the REST API!

    Conclusion

    Magento 2 can be extended in an easy way. If you like to play a little bit with the code of this blog post, checkout our demo module on Github.

    https://github.com/netz98/N98_WebapiRestPdf

  • PSR-7 Standard – Part 2 – Request and URI

    PSR-7 Standard – Part 2 – Request and URI

    This post is part of series:


    In the last blog post we described the history of PSR-7. The standard contains only interfaces. Today we start with the first two interfaces. The RequestInterface and the UriInterface.

    What is a HTTP Request?

    To start we create a little server simulation script with this content:

    <?php
    print_r($_REQUEST);
    

    After the creation we start the server script with PHP’s internal server by running this in our command line:

    php -S 127.0.0.1:8080 server.php

    This will start a server on our local machine listening on port 8080. Now, we have a little server to test some example requests.

    Example GET Request

    GET Requests are really simple. We can call the URL /mypath?foo=bar&baz=zoz with this simple text snippet.

    GET /mypath?foo=bar&baz=zoz HTTP/1.1
    Host: example.com
    

    To simulate a call we can make use of the popular command line tool “curl”. If it is not installed on your machine, you should install it.

    curl 'http://127.0.0.1:8080/mypath?foo=bar&baz=zoz'

    If our server is running, we should see the response in the command line:

    Array
    (
        [foo] => bar
        [baz] => zoz
    )

    Curl command to simulate:

    curl -X POST -d foo=bar -d baz=zoz 'http://127.0.0.1:8080/mypath'

    Example POST Request

    We can also post data. This is mostly done in HTML forms. The parameters are now part of a body. We need to tell the server the length of the data like in this snippet:

    POST /mypath HTTP/1.1
    Host: example.com
    Content-Type: application/x-www-form-urlencoded
    Content-Length: 15
    
    foo=bar&baz=zoz´
    

    As you can see, sending requests to a HTTP server is quite simple.

    Sending Requests in PHP

    In PHP we have several possibilities to send data to a remote server. The simplest way is to use one of the build-in functions like fopen, file_get_contents.

    Let’s create a file named client.php and this content:

    <?php
    echo file_get_contents('http://127.0.0.1:8080/mypath?foo=bar&baz=zoz');
    

    The output of the server should be the same as in our previous curl example. That was easy, but the usage of this functions has one drawback. The function was build to make calls to a local filesystem. It is possible to prohibit calls to remote servers by disabling it with the php.ini directive allow_url_fopen.

    Another popular way is the CURL PHP Module which adds additional PHP functions.

    <?php
    
    $ch = curl_init();
    
    curl_setopt($ch, CURLOPT_URL, 'http://127.0.0.1:8080/mypath?foo=bar&baz=zoz');
    $result = curl_exec($ch);
    print_r($result);
    
    curl_close($ch);

    But what if the module is not installed?

    To deal with this issues there are a lot of userland PHP clients in the wild. Most of the clients have an own abstraction of the request. That’s where the PSR-7 standards can help us in several ways.

    1. Harmonize the way how a request is built.
    2. Re-use code across applications.
    3. Dealing with the local environment (available PHP-Modules).

    RequestInterface

    The following code snippet shows the RequestInterface. The RequestInterface allows us to describe a RFC 7230 HTTP message.

    <?php
    
    namespace Psr\Http\Message;
    
    interface RequestInterface extends MessageInterface
    {
        /**
         * Retrieves the message's request target.
         * @return string
         */
        public function getRequestTarget();
    
        /**
         * Return an instance with the specific request-target.
         *
         * @param mixed $requestTarget
         * @return static
         */
        public function withRequestTarget($requestTarget);
    
        /**
         * Retrieves the HTTP method of the request.
         *
         * @return string Returns the request method.
         */
        public function getMethod();
    
        /**
         * Return an instance with the provided HTTP method.
         *
         * @param string $method Case-sensitive method.
         * @return static
         * @throws \InvalidArgumentException for invalid HTTP methods.
         */
        public function withMethod($method);
    
        /**
         * Retrieves the URI instance.
         * 
         * @return UriInterface Returns a UriInterface instance
         *     representing the URI of the request.
         */
        public function getUri();
    
        /**
         * Returns an instance with the provided URI.
         *
         * @param UriInterface $uri New request URI to use.
         * @param bool $preserveHost Preserve the original state of the Host header.
         * @return static
         */
        public function withUri(UriInterface $uri, $preserveHost = false);
    }

    Every library that creates an implementation of this interfaces should be used to create a HTTP request for every HTTP (1.1) server on the planet.

    To find an existing implementation we can use packagist.org. There is a virtual package with the name “psr/http-message-implementation” available. Feel free to use one of the implementations. As PHP developers we do not like to reinvent the wheel. https://packagist.org/providers/psr/http-message-implementation

    In our example at the end of the article we use the Guzzle Guzzle library. It is also possible to only install the PSR-7 implementation of the library (package: guzzlehttp/psr7) which implements the virtual package. If you are not familiar what a virtual package is, think of it like an interface for Composer packages. There is a good article which describes virtual packages.

    UriInterface

    The UriInterface describes the URI which should be called by our Request.

    <?php
    
    namespace Psr\Http\Message;
    
    /**
     * Value object representing a URI.
     */
    interface UriInterface
    {
        /**
         * Retrieve the scheme component of the URI.
         *
         * @return string The URI scheme.
         */
        public function getScheme();
    
        /**
         * Retrieve the authority component of the URI.
         *
         * @return string The URI authority, in "[user-info@]host[:port]" format.
         */
        public function getAuthority();
    
        /**
         * Retrieve the user information component of the URI.
         *
         * @return string The URI user information, in "username[:password]" format.
         */
        public function getUserInfo();
    
        /**
         * Retrieve the host component of the URI.
         *
         * @return string The URI host.
         */
        public function getHost();
    
        /**
         * Retrieve the port component of the URI.
         *
         * @return null|int The URI port.
         */
        public function getPort();
    
        /**
         * Retrieve the path component of the URI.
         *
         * @return string The URI path.
         */
        public function getPath();
    
        /**
         * Retrieve the query string of the URI.
         *
         * @return string The URI query string.
         */
        public function getQuery();
    
        /**
         * Retrieve the fragment component of the URI.
         *
         * @return string The URI fragment.
         */
        public function getFragment();
    
        /**
         * Return an instance with the specified scheme.
         *
         * @param string $scheme The scheme to use with the new instance.
         * @return static A new instance with the specified scheme.
         * @throws \InvalidArgumentException for invalid schemes.
         * @throws \InvalidArgumentException for unsupported schemes.
         */
        public function withScheme($scheme);
    
        /**
         * Return an instance with the specified user information.
         *
         * @param string $user The user name to use for authority.
         * @param null|string $password The password associated with $user.
         * @return static A new instance with the specified user information.
         */
        public function withUserInfo($user, $password = null);
    
        /**
         * Return an instance with the specified host.
         *
         * @param string $host The hostname to use with the new instance.
         * @return static A new instance with the specified host.
         * @throws \InvalidArgumentException for invalid hostnames.
         */
        public function withHost($host);
    
        /**
         * Return an instance with the specified port.
         *
         * @param null|int $port The port to use with the new instance; a null value
         *     removes the port information.
         * @return static A new instance with the specified port.
         * @throws \InvalidArgumentException for invalid ports.
         */
        public function withPort($port);
    
        /**
         * Return an instance with the specified path.
         *
         * @param string $path The path to use with the new instance.
         * @return static A new instance with the specified path.
         * @throws \InvalidArgumentException for invalid paths.
         */
        public function withPath($path);
    
        /**
         * Return an instance with the specified query string.
         *
         * @param string $query The query string to use with the new instance.
         * @return static A new instance with the specified query string.
         * @throws \InvalidArgumentException for invalid query strings.
         */
        public function withQuery($query);
    
        /**
         * Return an instance with the specified URI fragment.
         *
         * @param string $fragment The fragment to use with the new instance.
         * @return static A new instance with the specified fragment.
         */
        public function withFragment($fragment);
    
        /**
         * Return the string representation as a URI reference.
         *
         * @see http://tools.ietf.org/html/rfc3986#section-4.1
         * @return string
         */
        public function __toString();
    }

    One important thing you should know is that the implementation of the URI is always immutable. This means that every method returns a new instance of the object instead of a reference to the existing object.

    Wrong script:

    <?php
    $uri = new Uri();
    $uri->withHost(‘127.0.0.1’);
    $uri->withPort(8080);
    echo $uri; // empty output

    Correct script:

    <?php
    $uri = new Uri();
    $uri = $uri->withHost(‘127.0.0.1’);
    $uri = $uri->withPort(8080);
    echo $uri; // output: http://127.0.0.1:8080
    
    // or by using fluent interface
    
    $uri = (new Uri())->withHost('127.0.0.1')->withPort(8080);

    Using Guzzle

    As last part of this article we make use of the popular HTTP client library Guzzle. The library offers all the stuff HTTP provides. In our example we explicitly make use of the Guzzle PSR-7 implementation of the RequestInterface. The class we use is \GuzzleHttp\Psr7\Request.

    If you like to test the script, please feel free to install Guzzle using composer in your local directory (where all the other files mentioned above are) :

    composer.phar require guzzlehttp/guzzle:~6.0

    The code we use is this:

    <?php
    
    require_once 'vendor/autoload.php';
    
    $request = new \GuzzleHttp\Psr7\Request('GET', 'http://127.0.0.1:8080/mypath?foo=bar&baz=zoz');
    
    $client = new \GuzzleHttp\Client();
    $response = $client->send($request);
    echo $response->getBody();

    The Response of the script should be the same as before. What are the advantages of this approach?

    1. We create a PSR-7 compatible Request with Guzzle.
    2. The Guzzle HTTP Client follows the standard. So the Request must not be created by the Guzzle library. Use whatever you want.

    The next part of the series describes the HTTP Response.

  • My personal recap of Magento Imagine 2017 in Las Vegas

    My personal recap of Magento Imagine 2017 in Las Vegas

    It was the second time that I attended the Magento Imagine. Last year the conference was characterized by the motto „We are Magento“. This year the word „E-Commerce Platform“ stays in my mind.

    Before I start my summary of the conference, I would like to tell a little bit about our trip …

    We startet our #RoadToImagine from Frankfurt/Main. After a 9h flight we (Maria, Ralf, Alex and me) arrived in Houston (Texas). There we had time to grab some pizzas after a very intensive security check (2.5h). Next step was Las Vegas (Nevada). Our United Airline flight was overbooked. Fortunately we had no problems like reported in the news recently. No one was dragged of. 🙂

    So we landed in Las Vegas and reached the Wynn Hotel after >20h travel time. We fell in our bed deadly tired.

    Saturday

    The next day we did a road trip to fight against the Jet lag. So we startet with a great American Breakfast in a good well known diner. In a supermarket we bought some stuff and then we headed towards Hoover Dam.

    He didn’t expect four pan cakes!

    We drove along the Scenic Drive to see more of the beautiful landscape.

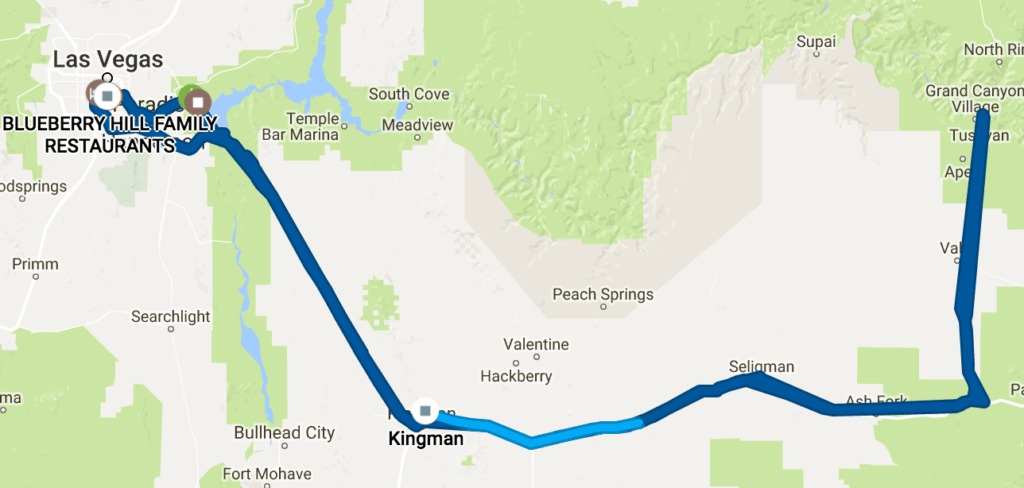
    Our road trip.

    After a stop at the Hoover Dam we visited the Grand Canyon. The landscape is so impressive. I personally like the endless expanses. The way back from Grand Canyon was a little bit rough. We had to leave the interstate after a road block caused by an accident. The deviation led us to the historic Route 66 which is not like a German Autobahn. We had to avoid large holes in the street. With a good burger we finished our road trip.

    Sunday

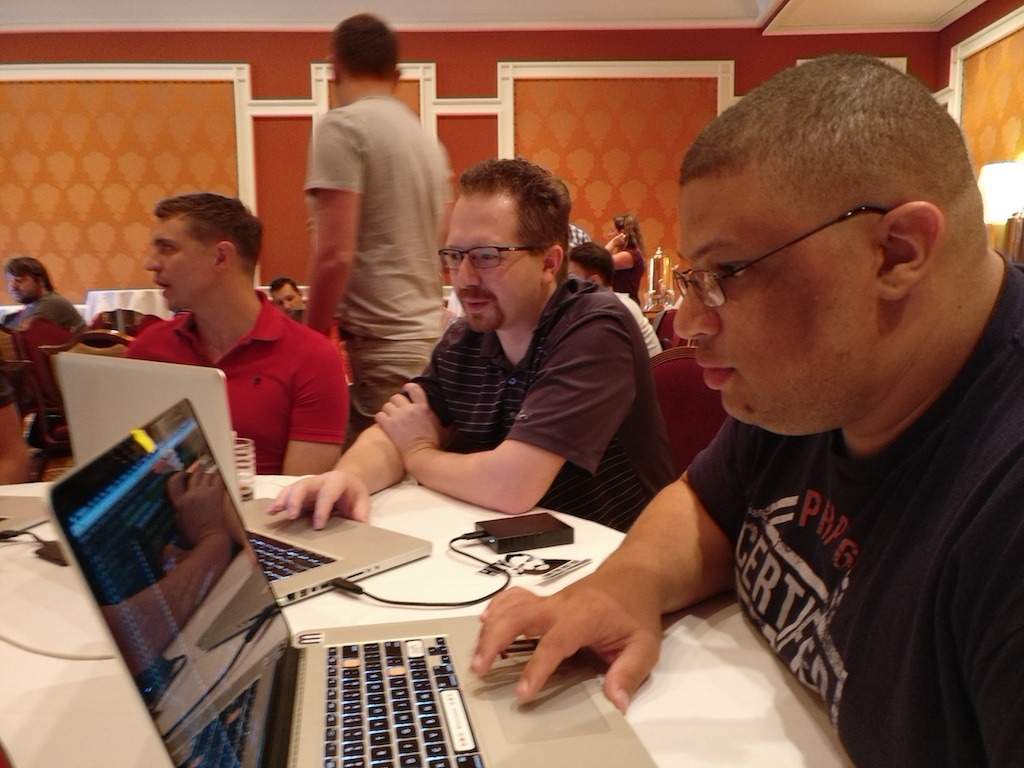
    The Sunday started with… an American Breakfast… again. We needed some calories to be prepared for the partner meeting. Before attending it, I visited the Pre-Imagine MageHackathon.

    Afterwards we joined the PreImagine to meet some famous guys of the Magento community. It was great to see all them. We also met some of our friends and associated agencies from Germany.

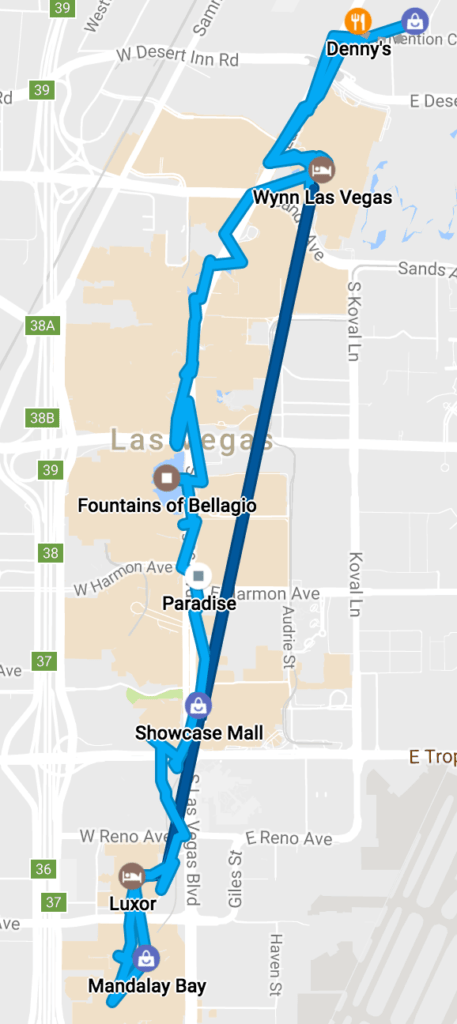
    After having some beers we decided to walked down the Las Vegas Strip.

    Our walk along the famous Las Vegas Strip.

    Monday (Imagine Day 1)

    The first official conference day started for us with a small and quick Continental Breakfast 🙂

    I decided to visit this sessions:

    The most discussed one of the developer talks, was about the UI Components. After it a discussion round  among some very popular backend developers started. They discussed about the good, the bad and the ugly sites of the Magento UI Components system.

    My highlight of the day was a session concerning the Magento 1 to 2 migration. Very good informations, tips and pain points of Magento Migrations were shown by James Cowie and Gordon Knoppe of Magento ECG.

    Tuesday (Imagine Day 2)

    On the second day the following session were my preferred choice:

    • How Quicken Took Magento Headless With Acquia Drupal
    • Internationalization: Steps to Take and Mistakes to Avoid
    • Making Your Life Easier with the Magento 2 CLI
    • Leveraging Microservices for Optimal Cloud Performance
    • The Rise of the Platform and the Power of the Magento 2 API

    The biggest surprise of the day was the API talk at the end of the day. The speaker Bob van Luijt is a very smart guy. I like his fresh mind and his approach to platforms and API usage. Checkout his HTML5 Polymer Magento Components on github!

    The Awards

    After the last session, the blood pressure of the netz98 coworkers increased significantly. It was the time of the „Magento Excellence Awards“.

    Our Liebherr project was one of the finalists in the category “B2B”. The awards reminded a little bit to the Oscar Awards. So we were absolutely excited that we really won the „B2B Innovation“ award. Especially me was so happy about this, because the project team (netz98 and Liebherr) did a really good job. The award was a appreciation of the effort of the hard working team. After the keynote was finished, we proudly carried away the award to the Legendary Imagine Evening Event „aka party“ taking place at the Encore Beach Club.

    Unfortunately I forgot to take pictures of the party. Thanks to Max Pronko for providing the video. At the end of the party Max jumped into the pool celebrating his shop award. The last scene of the video shows a wet Max and me 🙂

    Wednesday (Imagine Day 3)

    Our last conference day started with an impressive keynote. Magento published some exciting news about the product portfolio. Additionally new products were announced. After that we decided to have some burgers to be prepared for the DevExchange.

    DevExchange

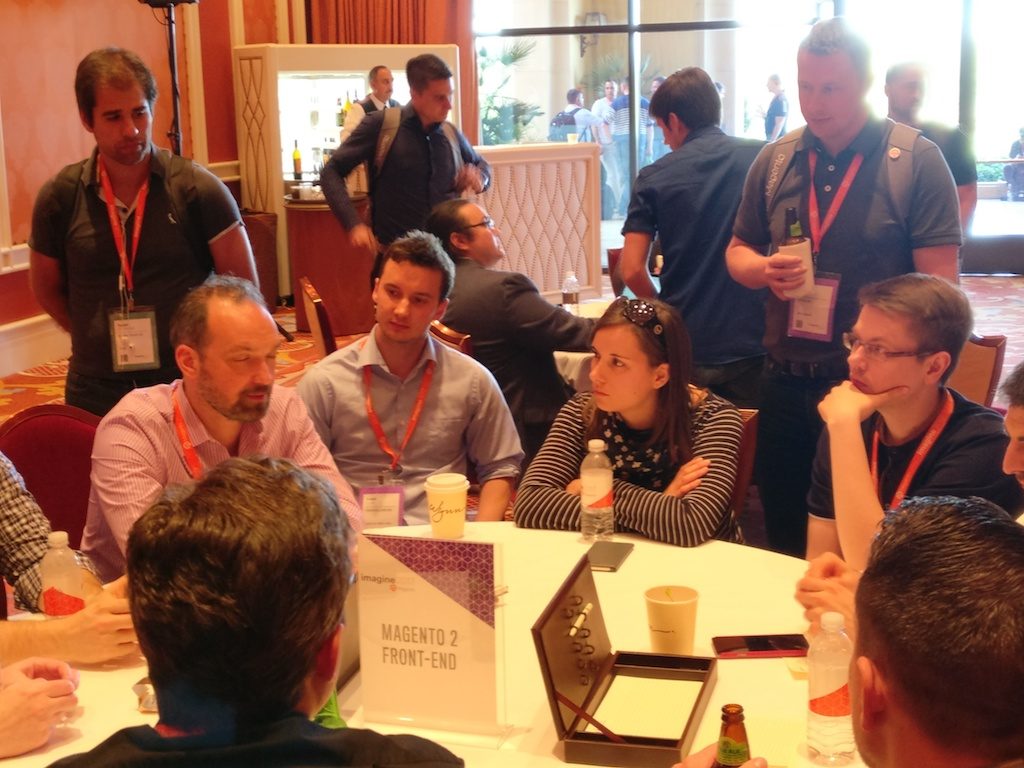
    The format of the DevExchange was really new for me. Developers could vote for a topic. My topic „A better import framework“ was one of the selected ones. For every topic a dedicated table was installed. All interested people could sit down at the appropriate one. Magento made sure, that for every table an employee is available, which is aware about the topic. I loved this kind of discussions. Other great topics like „Headless Magento“, Varnish Cache or „UI Components/Frontend“ were discussed by the participants.

    The frontend guru group.

    After this very good exchange, I discussed with Alan Kent about technical improvements of the future Magento 2 data layer. He is a great system architect. Later on I met Sander Mangel and Ivan Chepurnyi.

    It is great to meet people in real life and not only by the Twitter timeline.

    Sander an me.

    We finished the conference with a great final dinner at SW Steakhouse with the netz98 team.
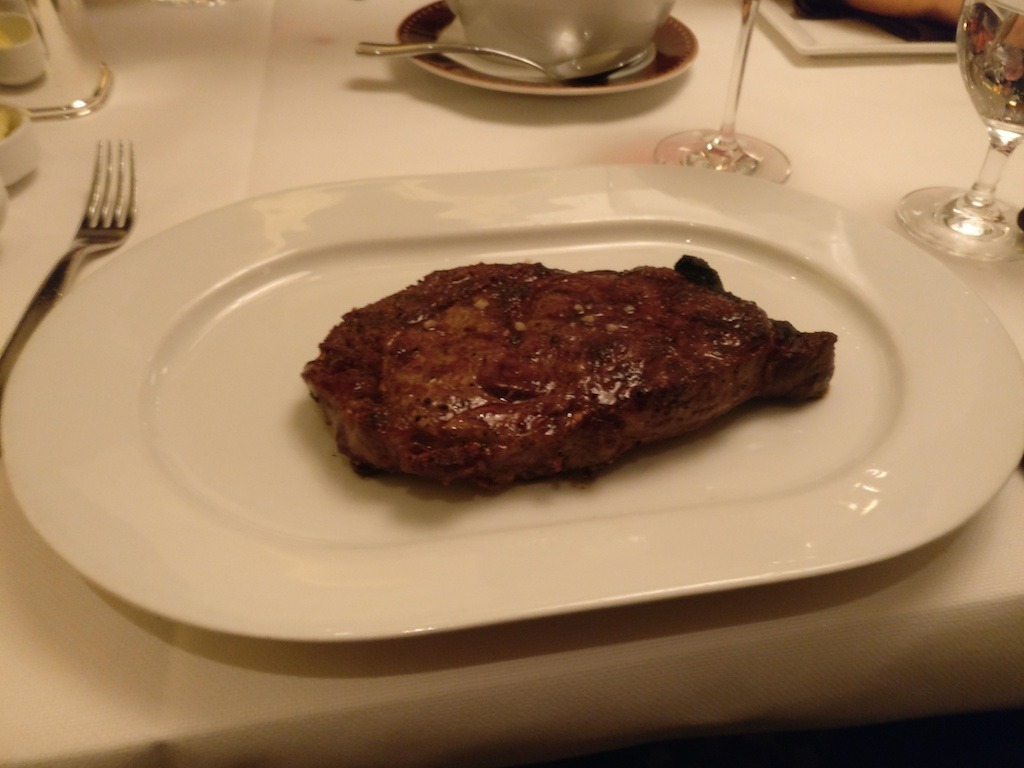
    The next day we went back to Germany. See you again, Vegas!

  • Use Swagger to generate a full functional Magento API Client

    Use Swagger to generate a full functional Magento API Client

    Magento 2 comes with a nice swagger schema which describes the Webapi. The Magento guys were very clever to choose swagger. It not only comes with a schema, but moreover it is a complete interactive API client as well.

    A swagger schema is a JSON document to formalize the REST API. Formalized documents have the big advantage that you can process the data with a machine. One idea I had was to create a PHP API for the Magento 2 API. Fortunately the swagger guys created a code generator tool. I really like the idea to generate code out of the schema. The swagger code-gen tool comes with support for multiple languages. PHP is one of the standard languages.

    The code generator tool can be found here: http://swagger.io/swagger-codegen/

    If you are on a mac it’s possible to install the code generator with homebrew.

    brew install swagger-codegen

    After the installation you can test the tool with the help command.

    swagger-codegen help

    On my machine i can see this help output. Works!

    usage: swagger-codegen-cli <command> [<args>]
    
    The most commonly used swagger-codegen-cli commands are:
        config-help   Config help for chosen lang
        generate      Generate code with chosen lang
        help          Display help information
        langs         Shows available langs
        meta          MetaGenerator. Generator for creating a new template set and configuration for Codegen.  The output will be based on the language you specify, and includes default templates to include.
        version       Show version information
    
    See 'swagger-codegen-cli help <command>' for more information on a specific
    command.

    Run the generator

    Now we are able to run the code generator. I used the schema from public developer documentation. You can also use your own schema from an existing installation.

    swagger-codegen generate -i http://devdocs.magento.com/swagger/schemas/latest-2.1.schema.json -l php
    cd SwaggerClient-php
    composer install --prefer-dist

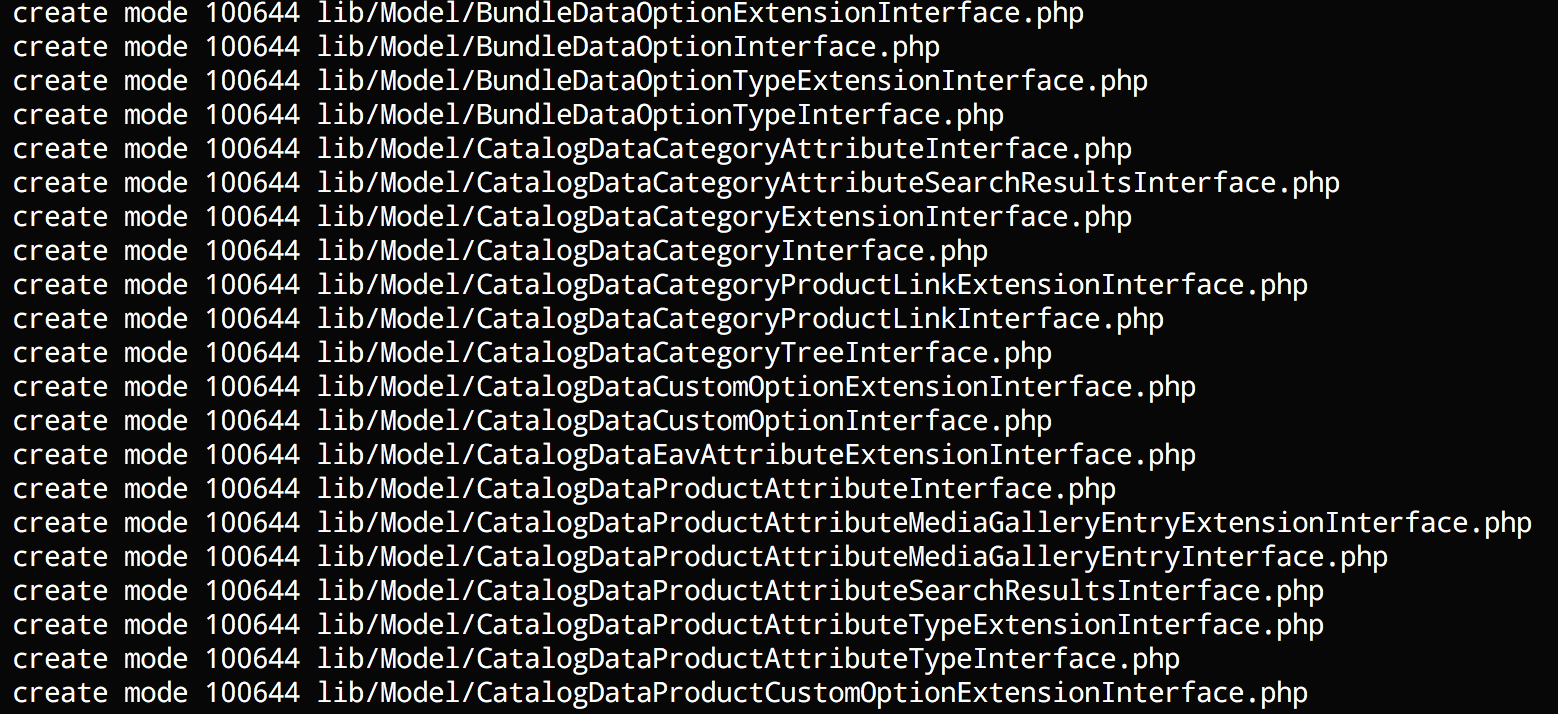
    You should see a long list of generated classes like this:

    Run test unit tests

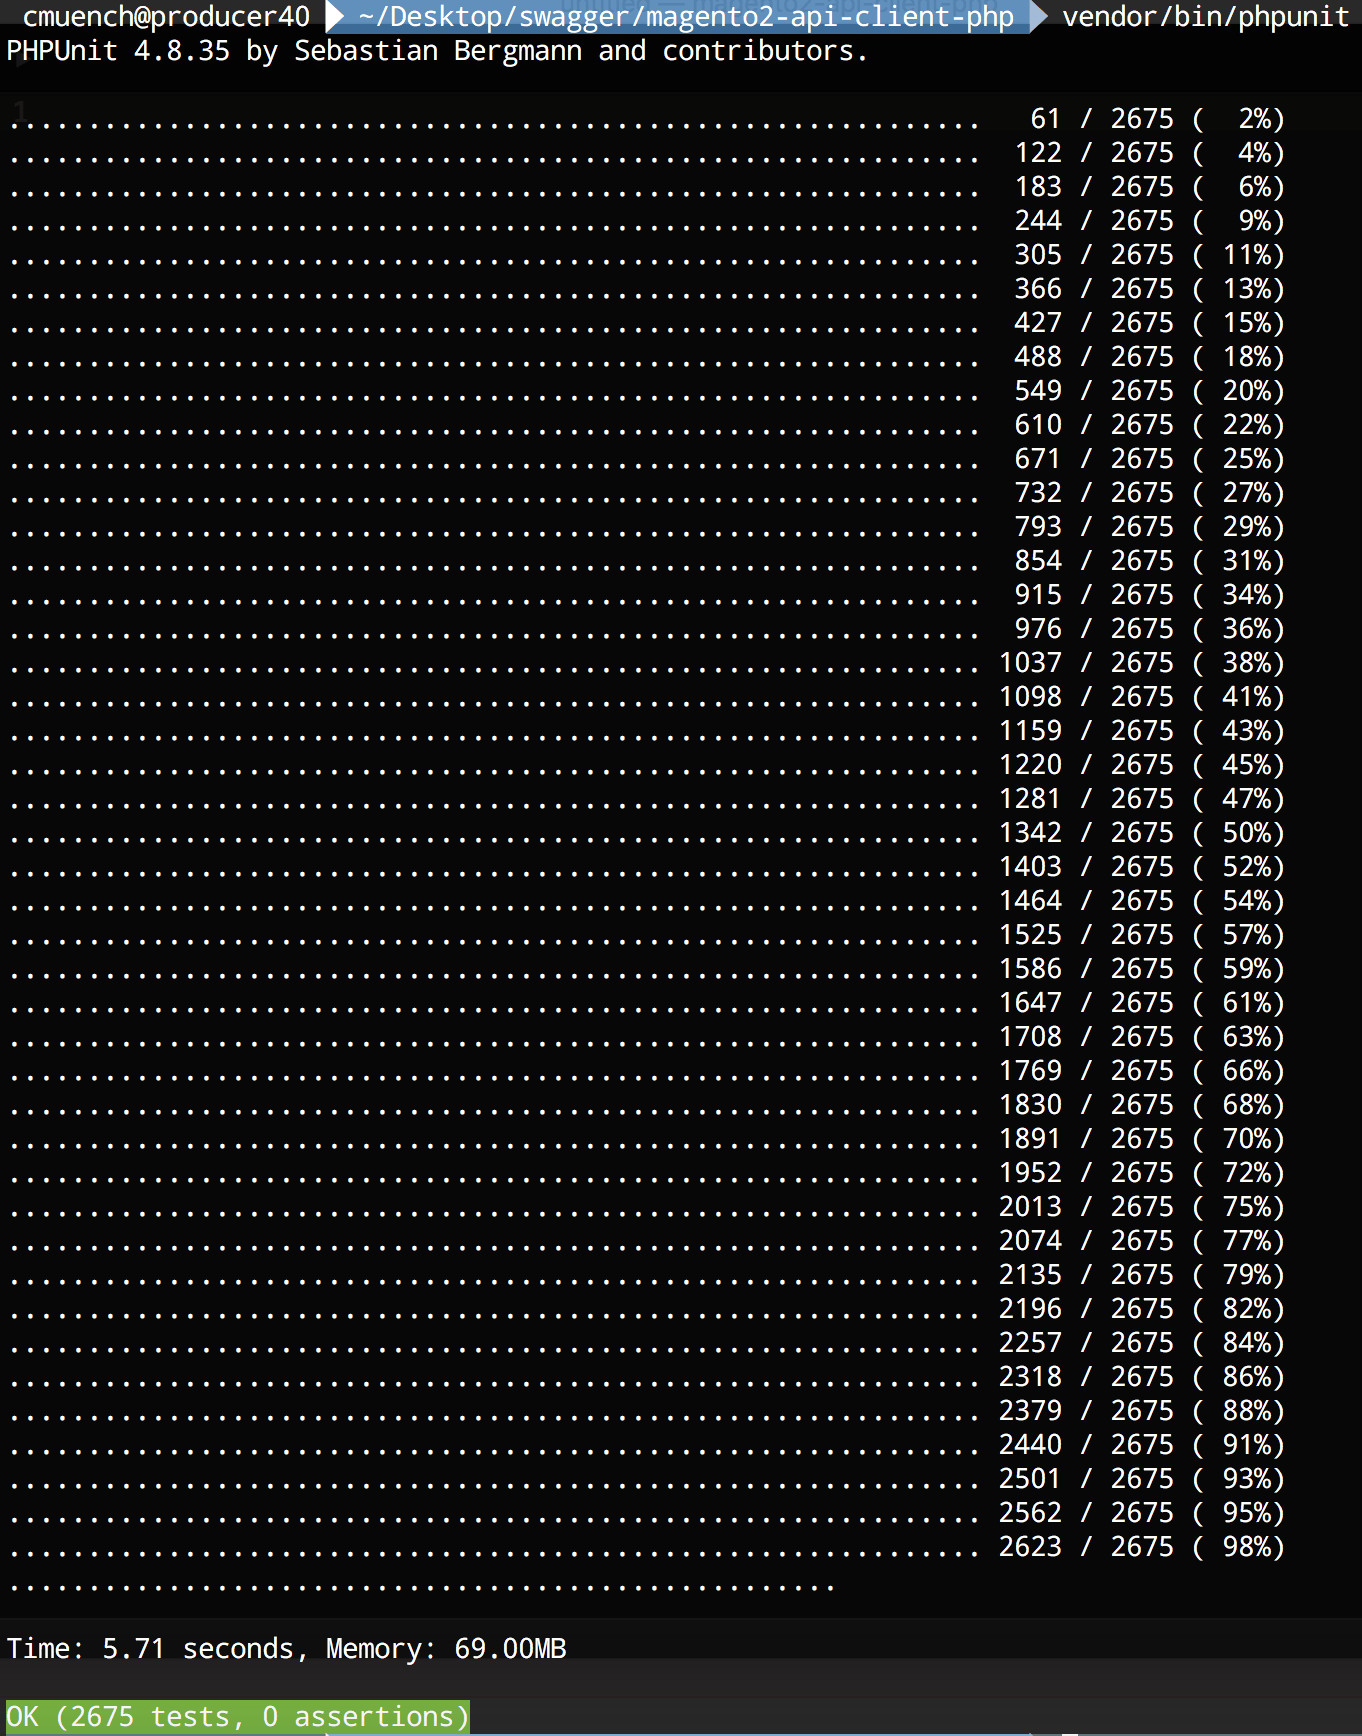
    After the code generation is done, we should run the generated unit tests. You can run the tests by typing vendor/bin/phpunit in the project folder.

    Test the new generated client

    After that we can try our freshly generated API client library.

    As an example we will fetch all the installed Magento modules of our shop instance.

    <?php
    require_once __DIR__ . '/vendor/autoload.php';
    
    $baseUrl = '{{YOUR_SHOP_URL}}/rest';
    $token = 'bearer {{YOUR_API_TOKEN}}';
    
    $config = new \Swagger\Client\Configuration();
    $config->setHost($baseUrl);
    $config->addDefaultHeader('Authorization', $token);
    
    $apiClient = new \Swagger\Client\ApiClient($config);
    
    $apiInstance = new \Swagger\Client\Api\BackendModuleServiceV1Api($apiClient);
    
    try {
        $result = $apiInstance->backendModuleServiceV1GetModulesGet();
        print_r($result);
    } catch (Exception $e) {
        echo $e->getMessage();
    }

    Save the script as installed_modules.php and replace {{YOUR_SHOP_URL}}  with a local or remote shop url and {{YOUR_API_TOKEN}} with a API bearer token of your user. A brief description about the generation of API-Tokens can be found in the developer documentation topic “Token-based authentication“.

    Now run the script with php installed_modules.php.

    On my local machine I am getting this output:

    Array
    (
        [0] => Magento_Store
        [1] => Magento_AdvancedPricingImportExport
        [2] => Magento_Directory
        [3] => Magento_Theme
        [4] => Magento_Backend
        [5] => Magento_Backup
        [6] => Magento_Eav
        [7] => Magento_Customer
        [8] => Magento_BundleImportExport
        [9] => Magento_AdminNotification
        [10] => Magento_CacheInvalidate
        [11] => Magento_Indexer
        [12] => Magento_Cms
        [13] => Magento_CatalogImportExport
        [14] => Magento_Catalog
        [15] => Magento_Rule
        [16] => Magento_Msrp
        [17] => Magento_Search
        [18] => Magento_Bundle
        [19] => Magento_Quote
        [20] => Magento_CatalogUrlRewrite
        [21] => Magento_Widget
        [22] => Magento_SalesSequence
        [23] => Magento_CheckoutAgreements
        [24] => Magento_Payment
        [25] => Magento_Downloadable
        [26] => Magento_CmsUrlRewrite
        [27] => Magento_Config
        [28] => Magento_ConfigurableImportExport
        [29] => Magento_CatalogInventory
        [30] => Magento_SampleData
        [31] => Magento_Contact
        [32] => Magento_Cookie
        [33] => Magento_Cron
        [34] => Magento_CurrencySymbol
        [35] => Magento_CatalogSearch
        [36] => Magento_CustomerImportExport
        [37] => Magento_CustomerSampleData
        [38] => Magento_Deploy
        [39] => Magento_Developer
        [40] => Magento_Dhl
        [41] => Magento_Authorization
        [42] => Magento_User
        [43] => Magento_ImportExport
        [44] => Magento_Sales
        [45] => Magento_CatalogRule
        [46] => Magento_Email
        [47] => Magento_EncryptionKey
        [48] => Magento_Fedex
        [49] => Magento_GiftMessage
        [50] => Magento_Checkout
        [51] => Magento_GoogleAnalytics
        [52] => Magento_GoogleOptimizer
        [53] => Magento_GroupedImportExport
        [54] => Magento_GroupedProduct
        [55] => Magento_Tax
        [56] => Magento_DownloadableImportExport
        [57] => Magento_Braintree
        [58] => Magento_Integration
        [59] => Magento_LayeredNavigation
        [60] => Magento_Marketplace
        [61] => Magento_MediaStorage
        [62] => Magento_ConfigurableProduct
        [63] => Magento_MsrpSampleData
        [64] => Magento_Multishipping
        [65] => Magento_NewRelicReporting
        [66] => Magento_Newsletter
        [67] => Magento_OfflinePayments
        [68] => Magento_SalesRule
        [69] => Magento_OfflineShipping
        [70] => Magento_PageCache
        [71] => Magento_Captcha
        [72] => Magento_Paypal
        [73] => Magento_Persistent
        [74] => Magento_ProductAlert
        [75] => Magento_Weee
        [76] => Magento_ProductVideo
        [77] => Magento_CatalogSampleData
        [78] => Magento_Reports
        [79] => Magento_RequireJs
        [80] => Magento_Review
        [81] => Magento_BundleSampleData
        [82] => Magento_Rss
        [83] => Magento_DownloadableSampleData
        [84] => Magento_Authorizenet
        [85] => Magento_OfflineShippingSampleData
        [86] => Magento_ConfigurableSampleData
        [87] => Magento_SalesSampleData
        [88] => Magento_ProductLinksSampleData
        [89] => Magento_ThemeSampleData
        [90] => Magento_ReviewSampleData
        [91] => Magento_SendFriend
        [92] => Magento_Ui
        [93] => Magento_Sitemap
        [94] => Magento_CatalogRuleConfigurable
        [95] => Magento_Swagger
        [96] => Magento_Swatches
        [97] => Magento_SwatchesSampleData
        [98] => Magento_GroupedProductSampleData
        [99] => Magento_TaxImportExport
        [100] => Magento_TaxSampleData
        [101] => Magento_GoogleAdwords
        [102] => Magento_CmsSampleData
        [103] => Magento_Translation
        [104] => Magento_Shipping
        [105] => Magento_Ups
        [106] => Magento_UrlRewrite
        [107] => Magento_CatalogRuleSampleData
        [108] => Magento_Usps
        [109] => Magento_Variable
        [110] => Magento_Version
        [111] => Magento_Webapi
        [112] => Magento_SalesRuleSampleData
        [113] => Magento_CatalogWidget
        [114] => Magento_WidgetSampleData
        [115] => Magento_Wishlist
        [116] => Magento_WishlistSampleData
        [117] => N98_Tutorial
        [118] => N98_Tutorial2
    )

    Conclusion

    That’s it. We have a full functional REST API client in PHP to call Magento 2 instances. The generated code is not perfect but very usable.

    You can try it by yourself. For all lazy developers we pushed the code in a public github repository.

    https://github.com/netz98/magento2-swagger-api-client-demo

    Have fun!

  • A framework to prevent invalid stuff in your GIT repository

    A framework to prevent invalid stuff in your GIT repository

    The following blog post describes a a framework for managing and maintaining multi-language pre-commit hooks. The described methods adding a comprehensive quality gate to your publishing workflow. If you are using SVN instead of GIT you can skip this blog post 😛

    The framework was designed by Yelp three years ago. It brings many pre defined checks designed for a generated GIT pre-commit hook. Most of the checks are made to to run against python files. This is not a blocker for PHP developers. Fortunately the framework can be extended by scripts. It’s also possible to share the checks in extra remote repositories. So you can build a pre-commit kit for your purposes. The standard repository comes with some nice checks for i.e. XML or YAML files. Other stuff like checking for broken symlinks or “merge residues”. A complete list and a documentation can be found on project website.

    Installation

    The installation is simple. It can be done by brew or the python installer pip. Most Linux distributions come with pip already installed. Mac users can install python with pip or use brew.

    On Mac:

    brew install pre-commit

    or with Python PIP:

    pip install pre-commit
    

    After the installation we should have a binary “pre-commit”.

    Config

    For configuration a YAML format is used. All the configs are validated by pre-commit. That’s a good thing. If you have a mistake in your config file it will print out a long list of syntax rules. Config entries start with a „repo“ which must be a git repository URL. The example shows the external repository provided by hootsuite.

    - repo: git@github.com:hootsuite/pre-commit-php.git
       sha: 1.2.0
       hooks:
       - id: php-lint
       - id: php-unit
       - id: php-cs-fixer
         files: \.(php)$
    

    Hooks can also be defined locally. Add the pseudo repository name „local“:

    - repo: local
      hooks:
        - id: "run-unit-tests"
          name: "Run Unit-Tests"
          entry: "./vendor/bin/phpunit"
          language: "script"
          always_run: true
          files: \.(php)$

    Every rule must have an IDE. That’s important if you share a rule in your own repository. If the rule is provided by an external repository it must be defined in a „hooks.yaml“ file. To use the hooks in your lokal project a .pre-commit-config.yaml file must be created.

    Install the hooks

    The installation of the hooks in your config can be done by running pre-commit install. That’s all we need to do. After that all our commits are checked by the installed hooks.
    It’s also possible to update the YAML file versions like „composer update“ with pre-commit autoupdate. This fetches the newest version of the commits from remote repositories.

    Test the hooks

    Simply run pre-commit run --all-files to test all hooks against the whole local working copy.

    Commit your code

    Congratulations! You have now a QA step between you and your CI server. If you commit some code the automatic checks should run and prevent bigger issues. To secure the complete project it’s necessary to setup the same checks on your continuous integration server. If you don’t have a CI-Server like Jenkins, Gitlab etc. and working for your own this setup is good enough.

    git commit -a

    Example config for a PHP library

    This config provides us the following checks:

    • Validate composer.json file with composer
    • Prevent large files in commits like a database dump
    • Check for valid JSON and XML files
    • Check if merge conflict entries are not resolved
    • Check if a file has a wrong BOM
    • Run php-cs-fixer and fix code against a .php_cs file.

    Example .pre-commit-config.yaml:

    -   repo: local
        hooks:
        -   id: validate-composer-json
            name: Validate Composer JSON
            entry: "composer validate --strict"
            language: system
            files: composer\.json
    -   repo: git://github.com/pre-commit/pre-commit-hooks
        sha: 5da199bb8d60f764c0f77a20b0a1dc3a7640bcdd
        hooks:
        -   id: check-added-large-files
        -   id: php-unit
        -   id: check-json
        -   id: check-xml
        -   id: check-merge-conflict
        -   id: check-byte-order-marker
    -   repo: git://github.com/hootsuite/pre-commit-php.git
        sha: 1.2.0
        hooks:
        -   id: php-cs-fixer
            args:
            - -q
            - --config-file=.php_cs
        -   id: php-lint-all

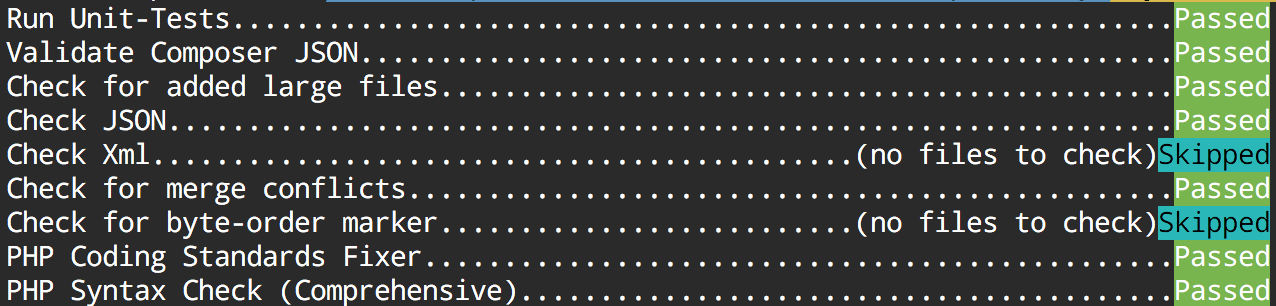
    Output:

    If you find the concept good, we would be happy if you leave a comment.

    Have fun!


    PS: Thanks to David Lambauer for discovering the framework at netz98.

  • PSR-7 Standard  – Part 1  – Overview

    PSR-7 Standard – Part 1 – Overview

    This post is part of series:


    This is the first post of my new PSR-7 series. If you already use PSR-7 in your daily life as programmer you can skip the first part of this post.

    What is PSR-7?

    PSR-7 is a standard defined by the PHP-FIG. It don’t like to repeat the standard documents in my blog post. The idea is to give you some real world examples how you can use PSR-7 in your PHP projects. If you investigate the standard you can determine that it doesn’t contain any implementation.

    Like the other standard of the FIG it only defines PHP interfaces as contracts. The concrete title of the standard is HTTP message interfaces. And that’s all what it defines. It defines a convenient way to create and consume HTTP messages. A client sends a request and a server processes it. After processing it, the server sends a response back to the client.

    Nothing new? Yes, that is how any PHP server application works. But without PSR-7 every big framework or application implements it’s own way to handle requests and responses. Our dream is that we can share HTTP related source code between applications. The main goal is: interoperability.

    History

    Before any PSR standard we had standalone PHP applications. There were some basic PHP libraries to use. Most of the code was incompatible. With PSR-0 we got an autoload standard to connect all the PHP libraries.

    The PSR-7 is a standard to connect an application on HTTP level. The first draft for PSR-7 was submitted by Michael Dowling in 2014. Michael is the creator of Guzzle, a famous PHP HTTP client library. He submitted his idea. After that the group discussed the idea behind a standardized way to communicate with messages. Matthew Weier O’Phinney (the man behind Zend Framework) took over the work of Michael.

    In May 2015 we had an officially accepted PSR-7. After that the most big frameworks adopted the standard or created some bridge/adapter code to utilize the new standard.

    Overview

    Thanks to Beau Simensen


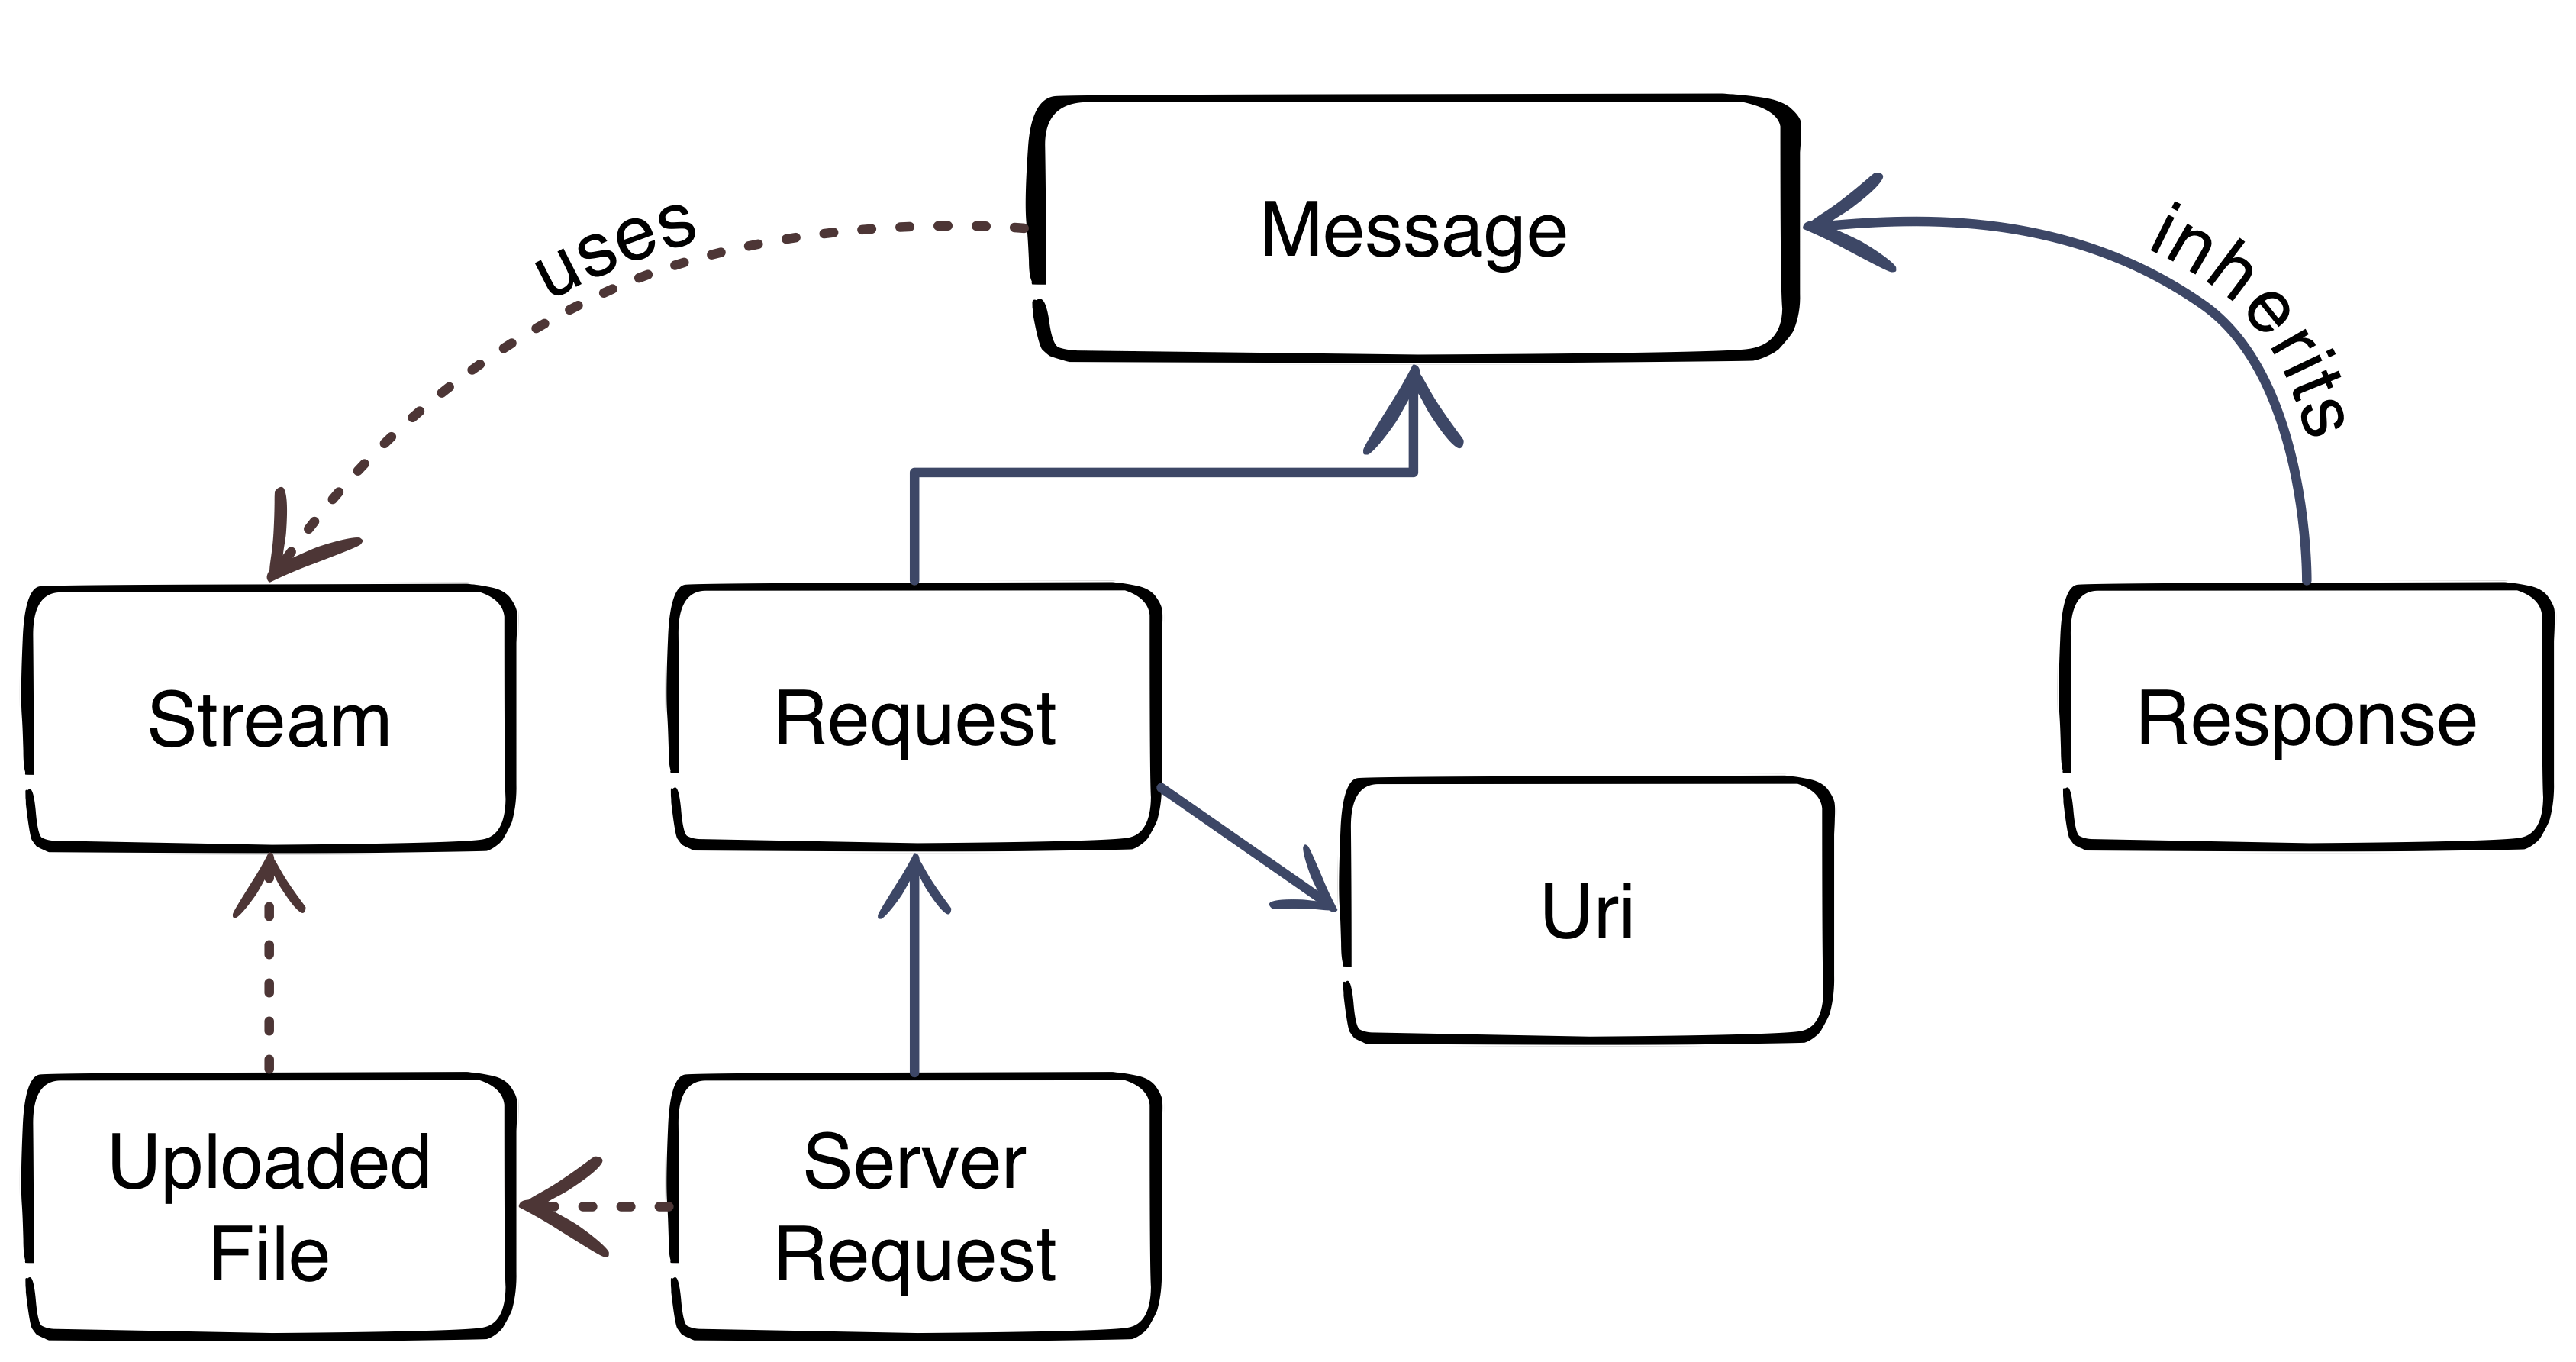
    The image gives us an overview about the PSR-7 interfaces. The blue color represents the inheritance. The message interface is the main interface of the standard. The request of a client and the response of the server inherit the message interface. That’s not surprising, because the message utilizes the HTTP message itself. The red dotted lines clarify the usage of other parts.

    Request-flow with PSR-7

    The main flow with PSR-7 is:

    1. Client creates an URI
    2. Client creates a request
    3. Client sends the request to server
    4. Server parses incoming request
    5. Server creates a response
    6. Server sends response to client
    7. Client receives the response

    This was the first part of the blog series. The next part will look more closely at the request and the URI.

  • How to add alternative HTTP headers to Magento 2?

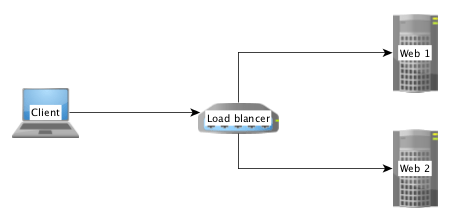
    If you have more than one frontend server running in your business, it’s needed to load balance the traffic between the nodes. In this case we have a new instance between the browser and the web-server.

    Often it’s a system like HAProxy or Varnish.

    Simple load balancer/proxy setup

    If the load balancer or proxy receives a request from a browser, it forwards it to backend server in the internal network. The IP address of the client is than added to a forward header which contains the IP address of a forward chain.

    Example:

    X-Forwarded-For: client, proxy1, proxy2

    In some situation i.e. for GEO-IP checks, you need the real IP address of a client. If you don’t configure Magento the remote address is always 127.0.0.1.

    That’s not what we want. We need the first part of the comma separated list of the IP chain. Magento offers us a mechanism to solve this issue.

    Remote Address

    The key to solve the issue is the class Magento\Framework\HTTP\PhpEnvironment\RemoteAddress which is provided by the Magento 2 framework.

    In Magento 2 it’s prohibited to call the $_SERVER['REMOTE_ADD'] directly. The RemoteAddress class is a wrapper to deal with the remote address.

    The correct way to get the remote address is this:
    use Magento\Framework\HTTP\PhpEnvironment\RemoteAddress;

    use Magento\Framework\HTTP\PhpEnvironment\RemoteAddress;
    
    class MyClass
    {
        /**
         * @var RemoteAddress
         */
        private $remoteAddress;
    
        public function __construct(RemoteAddress $remoteAddress)
        {
            $this->remoteAddress = $remoteAddress;
        }
    
        public function doSomething()
        {
            $ipAddressOfTheClient = $this->remoteAddress->getRemoteAddress();
        }
    }
    

    Configuration

    It’s possible to inject a list of alternative headers to the RemoteAddress class by Dependency Injection. This config isn’t related to any module. It’s a special config for a production server setup.

    It’s important to know that Magento 2 will load any „di.xml“ file from any subfolder of the „app/etc“ folder!

    With this information we can create a subfolder like „app/etc/myproject/di.xml“ with the following content:

    <?xml version="1.0"?>
    <config xmlns:xsi="http://www.w3.org/2001/XMLSchema-instance"
            xsi:noNamespaceSchemaLocation="urn:magento:framework:ObjectManager/etc/config.xsd">
    
        <type name="Magento\Framework\HTTP\PhpEnvironment\RemoteAddress">
            <arguments>
                <argument name="alternativeHeaders" xsi:type="array">
                    <item name="x-forwarded-for" xsi:type="string">HTTP_X_FORWARDED_FOR</item>
                </argument>
            </arguments>
        </type>
    </config>


    After that Magento will look into the given HTTP header „X-Forwarded-For“. The name of the header is normalized by PHP.
    X-Forwarded-For is available as $_SERVER['HTTP_XFORWARDED_FOR'].

    It’s possible to add more than one header to alternative header list.

    That’s it. Have fun with Magento 2. 🙂

  • Array does not exist in webapi

    The Magento 2 webapi is very useful to publish entities to the world.
    One big advantages of the new webapi is the automatic generation of a swagger schema for RESTful API.
    If you prefer SOAP over REST you should also be happy to heat that Magento 2 will automatically generate all the WSDL stuff.

    Magento 2 analyses all the published classes/methods via PHP reflection.
    Any generated WSDL file contains a XSD with all the types used in the webservices.

    In some cases the generation stops with the following error message:

    Class "array" does not exist. Please note that namespace must be specified.

    What’s up with this message?

    (more…)